一、主要思路
-
1.利用截图软件
flameshot进行截取需要被文字识别的图片,并使用imagemagick对图片进行四倍放大; -
2.利用百度AI OCR文字识别服务进行识别(每个月只有1000次免费使用额度);
-
3.将识别到的结果输出,复制到文件和剪切板。
二、安装相关软件
需要安装的软件有:flameshot、imagemagick。
1.安装软件主体
(1)使用如下命令安装flameshot:
sudo pacman -S flameshot
(2)使用如下命令安装imagemagick,用于图片放大:
sudo pacman -S imagemagick
2.获取百度AI OCR文字识别服务
(1)安装 OCR Python SDK
pip3 install baidu-aip
(2)注册百度智能云获得 APPID AK SK:
注册并登陆进入百度智能云https://ai.baidu.com/tech/ocr,在百度 AI 文字识别服务页面 https://console.bce.baidu.com/ai/?fromai=1#/ai/ocr/overview/resource/getFree先领取OCR免费资源:

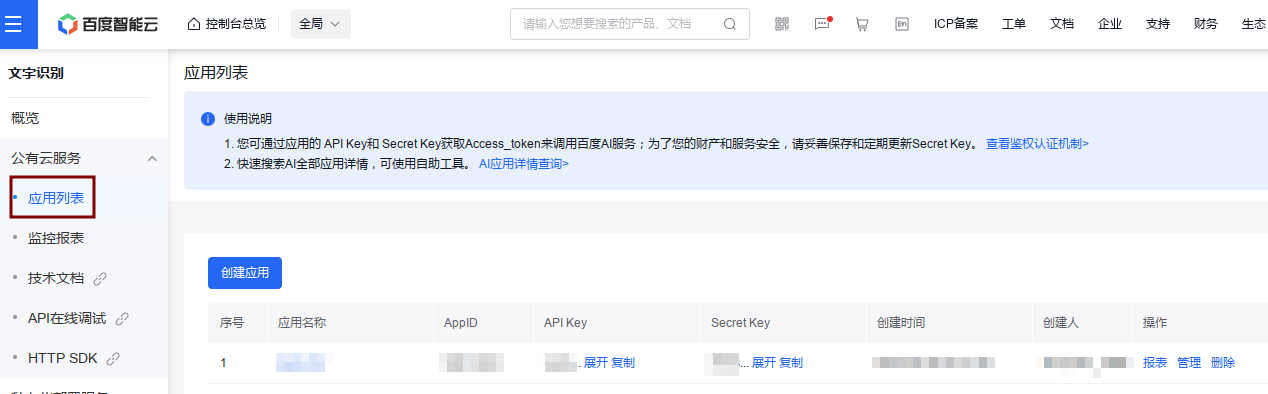
在产品服务中进入文字识别模块https://console.bce.baidu.com/ai/?fromai=1#/ai/ocr/overview/index创建应用:

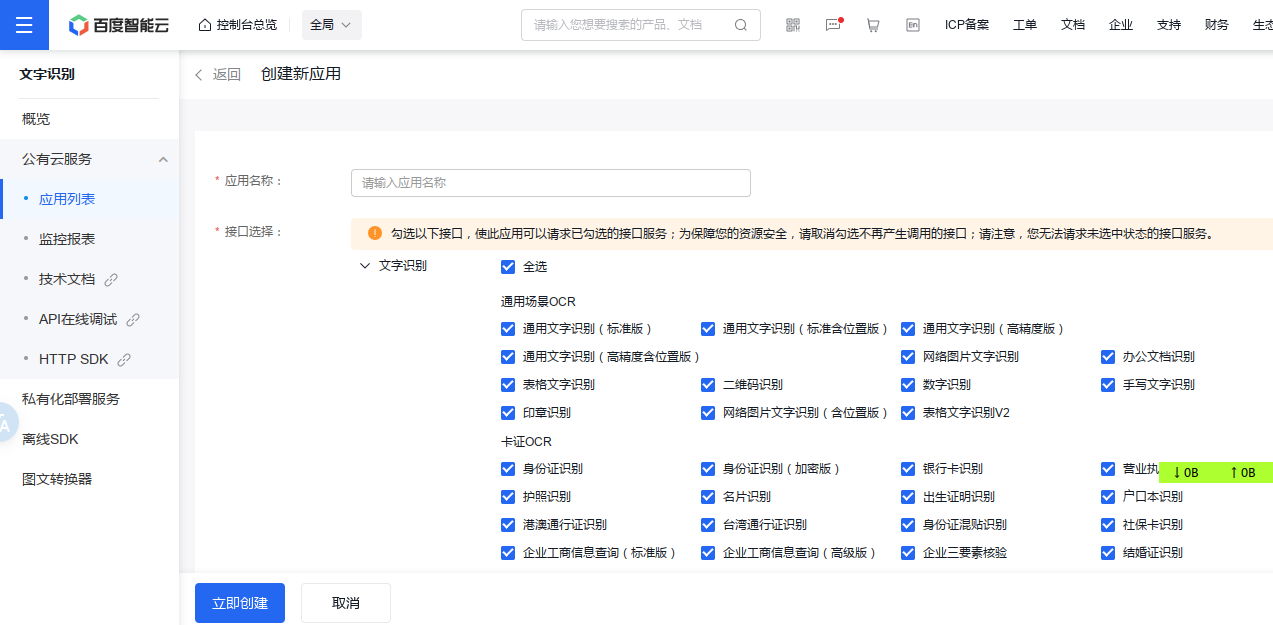
然后就能获取到下面将要用到的AppID、API Key、Secret Key了!
三、制作[python和shell脚本]一键识别,并输出到文件和剪切板
在目录/home/dh/opt/baiduOcr/新建后缀为.sh的shell脚本文件baiduOcr.sh,并在同目录下新建文件/home/dh/opt/baiduOcr/baiduOcr.py。
将以下代码复制到文档baiduOcr.py:
注意:将变量file = open路径部分替换成你想要存放截图以及识别结果txt文档的路径;
#! /usr/bin/python3
#coding=utf-8

# baiduOcr.py
# 调用百度ocr接口快速准确提取图片中文字

from aip import AipOcr
import json
import sys


""" 读取图片 """
def get_file_content(filePath):
    with open(filePath, 'rb') as fp:
        return fp.read()


if __name__ == "__main__":

    """ 你的 APPID AK SK """
    APP_ID = '你的AppID'
    API_KEY = '你的API Key'
    SECRET_KEY = '你的Secret Key'

    client = AipOcr(APP_ID, API_KEY, SECRET_KEY)

    image = get_file_content(sys.argv[1])

    """ 调用通用文字识别, 图片参数为本地图片 """
    client.basicGeneral(image);

    """ 如果有可选参数 """
    options = {}
    options["language_type"] = "CHN_ENG"
    options["detect_direction"] = "false"
    options["detect_language"] = "true"
    options["probability"] = "false"

    """ 带参数调用通用文字识别, 图片参数为本地图片 """
    result = client.basicGeneral(image, options)

    text = ''
    for item in result['words_result']:
#       text += item['words']  # 不添加换行符,直接拼接图片中每一行字符串
        text += item['words'] + '\n'  # 在图片中每行字符串后面添加一个换行符
    # 如果不需要在最终字符串的末尾有一个额外的换行符,可以去除它
    if text and text.endswith('\n'):
        text = text[:-1]
#   print(text)

    # 将识别的文本写入src.txt
    text_str = str(text)
    file = open("/home/dh/opt/baiduOcr/screenshot/src.txt", 'w')
    file.write(text_str)
    file.close()
将以下代码复制到文档baiduOcr.sh:
注意:将变量SCR路径部分替换成你想要存放截图以及识别结果txt文档的路径;
#!/bin/env bash
# Dependencies: imagemagick flameshot xclip(optional)

#Name: OCR Picture for Arch Linux
#Fuction: take a screenshot and OCR the letters in the picture
#Path: /home/Username/...

#you can only scan one character at a time
baiduOcrPy="/home/dh/opt/baiduOcr/baiduOcr"
SCR_0="/home/dh/opt/baiduOcr/screenshot/src_origin"
SCR="/home/dh/opt/baiduOcr/screenshot/src"

# before take a screenshot, if file "src.png" and "src_origin.png" exist, delete these two files
rm -f $SCR.png $SCR_0.png

##  截图后,直接放大并覆盖原始文件方法 Start
# take a shot what you wana to OCR to text, delay 2 seconds
#flameshot gui -p $SCR.png -d 2000
# increase the png, 亮度不变,色调重置为中性(即不会偏向红色、绿色或蓝色)
# mogrify 直接放大并覆盖原始文件
#mogrify -modulate 100,0 -resize 400% $SCR.png
# should increase detection rate
##  截图后,直接放大并覆盖原始文件方法 End

##  截图后,放大原始图像文件后,同时保留原始图像文件和放大后图像文件 Start
# take a shot what you wana to OCR to text, delay 2 seconds
flameshot gui -p $SCR_0.png -d 2000
# increase the png, 亮度不变,色调重置为中性(即不会偏向红色、绿色或蓝色)
# convert 放大原始文件,创建调整后图像,并保留原始图像
convert $SCR_0.png -modulate 100,0 -resize 400% $SCR.png
# should increase detection rate
##  截图后,放大原始图像文件后,同时保留原始图像文件和放大后图像文件 End

# OCR by tesseract
# tesseract $SCR.png $SCR &> /dev/null -l eng+chi_sim+chi_sim_vert+osd+equ   # 简体中文+英文
python3 $baiduOcrPy.py $SCR.png

# get the text and copy to clipboard

# if you use xclip as your clipboard, use this command:
#cat $SCR.txt | xclip -selection clipboard

# if you use kde clipper as your clipboard, use this command:
getSCR=$(cat $SCR.txt)
qdbus org.kde.klipper /klipper setClipboardContents "$getSCR"

# 设置一个陷阱来捕获EXIT信号
on_exit() {
    # 在这里发送通知
    notify-send "OCR识别结束" "已OCR识别完毕截取的图片,并已将识别文本复制到剪贴板,Ctrl+V粘贴即可!"
}

# 使用trap命令注册on_exit函数,以便在脚本退出时调用它
trap on_exit EXIT

# 使用exit命令退出脚本,这将触发on_exit函数并发送通知
exit 0  # 0表示成功退出
添加运行权限
sudo chmod a+x baiduOcr.sh
四、设置快捷键,一键调用shell脚本
打开系统设置,点击键盘–快捷键,右边顶部可看到+号,点击+号添加快捷键。
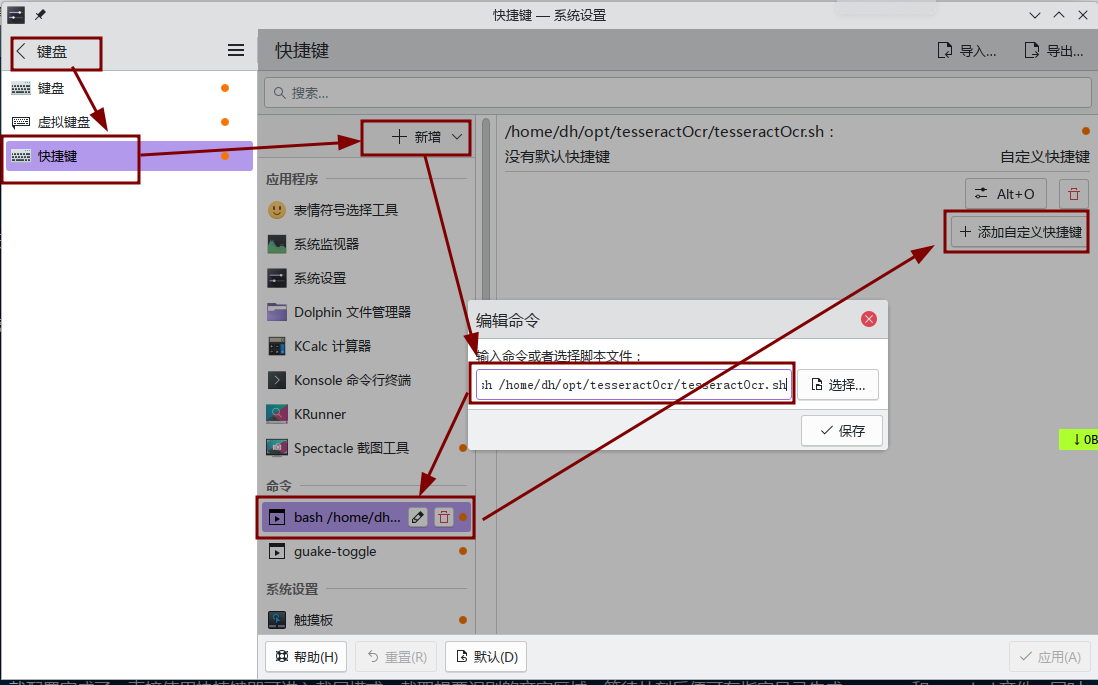
命令:bash 这里换成你自己shell脚本baiduOcr.sh所在的路径;例如,我这里的bash命令为:
bash /home/dh/opt/baiduOcr/baiduOcr.sh
添加自定义快捷键时,不要与你系统中的其他快捷键冲突,我这里设置的快捷键是“Alt+B”
这样就配置完成了。直接使用快捷键即可进入截屏模式,截取想要识别的文字区域,等待片刻后便可在指定目录生成src.png和src.txt文件,同时,文字会自动复制到剪切板,可以直接粘贴使用。
参考:
版权声明:本文由 Duter2016 在 2024年03月29日发表。本文采用CC BY-NC-SA 4.0许可协议,非商业转载请注明出处,不得用于商业目的。
文章题目及链接:《Linux下调用百度OCR接口识别图片文字》

